Teaching someone to ride a unicycle can be very rewarding and here is a structured guide to help you.
There are 5 progressive stages to the learning to ride a unicycle.
- Getting on the unicycle
- Finding Balance
- Dismounting
- Moving
- Launching
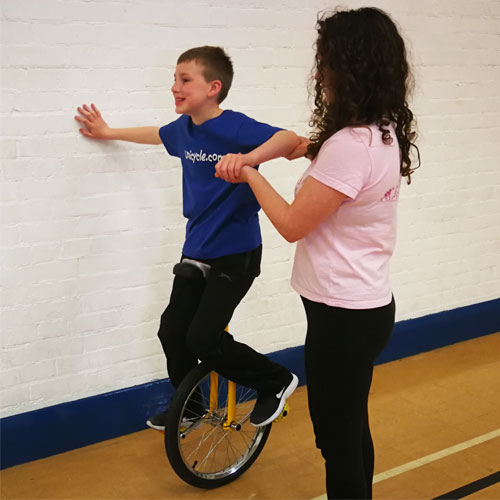
1. Getting on the unicycle - get on the unicycle safely - 5 to 10 minutes.
Find a wall next to some flat ground, ideally with a grab rail at chest height.
- Ascertain which is the riders dominate foot. You can normally just ask them or look at which foot they want to put on the pedal first.
- The rider should then stand next to the wall/rail with their dominate foot closest to the wall. Ideally the wheel should be about 50cm (24") away from the wall.
- They should stand next to the wall while holding the unicycle by the saddle in front and with their other hand holding the wall. The crank/pedal for their dominant foot should be closest to the rider, ideally about the 4 o'clock position (the wheel will probably need to be rotated by hand in to this position).
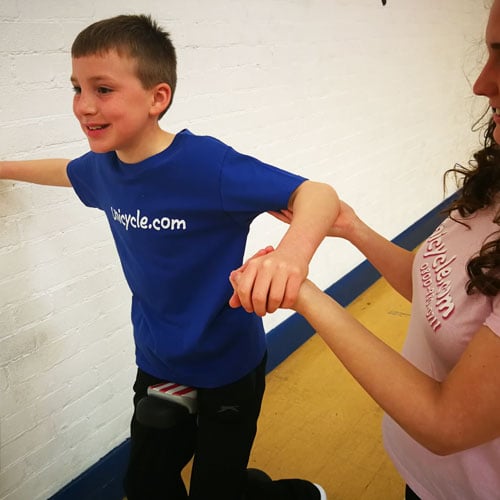
- The rider should then place the saddle in their crotch and presses on the pedal so that the unicycle winds up underneath them. They will most likely need help with this, it is best to assist them by holding their free hand and elbow.
- The pedals will then be vertical
- Assist the rider to move backwards so the pedals are horizontal (this is known as the stable position).
- Now assist the rider to step off to the rear of the unicycle
This process should be repeated several times until the rider is comfortable enough to get on and off by them selves.
 |
 |
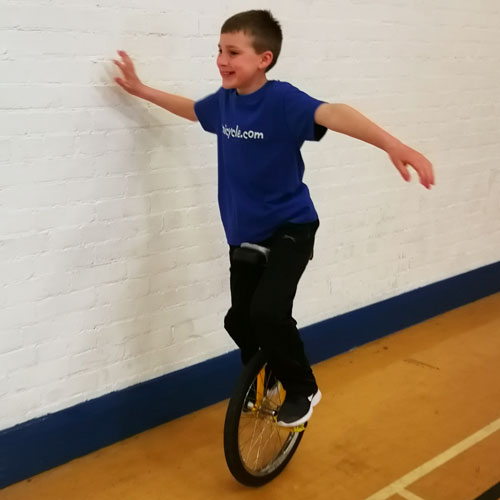
2. Finding Balance - sitting on the unicycle - 10 to 20 minutes.
It is important that the rider familiarises them selves with the experience of sitting on the saddle and finding their balance. To do this leave the rider sitting on the unicycle for longer and longer before you assist them to dismount when practicing the "getting on" exercise. You need to emphasise:
- Keep their weight on the saddle.
- Sit upright
- Keep the pedals horizontal (although some moving to find balance is good).
- Keep one hand one the wall while the other is straight out (after the initial part where their helper can support them).
- Look ahead at a fixed object.
 |
3. Dismounting - practicing dismounting without assistance - 5 to 10 minutes.
Allow the rider to practice dismounting safely while "spotting" them to be sure they do not fall badly. key points are:
- Step forward off the unicycle letting it fall away to the floor.
- Do not let them catch the unicycle
- Keep one hand one the wall while the other is straight out.
- Look ahead at a fixed object, not your feet.
This helps the rider build confidence as it reassures them that they can not be hurt by getting off the unicycle.
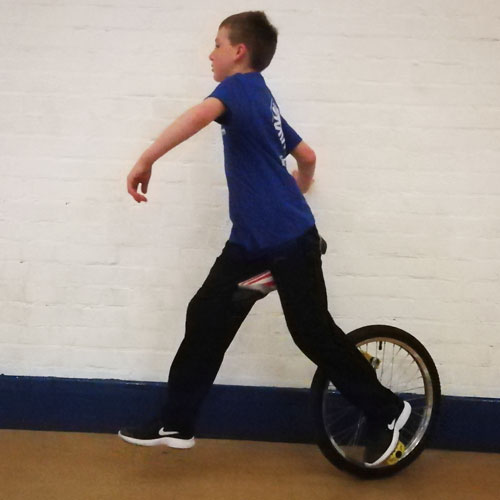 |
4. Moving - practicing moving along the wall - 30 to 60 minutes.
Get the rider to move slowly along the wall bar at walking pace. Start by doing a single rotation and pausing, then get them to ride continually. Initially the rider will need assistance, hold their free hand and elbow. Key points are:
- Rotate the pedals smoothly
- Do not ride too slowly
- Look ahead at a fixed object, not your feet.
- Put all the weight through the saddle - do not stand up on the pedals.
- If you are teaching a large group, set up a one way system along the wall.
- At this stage it is often useful to pair up the learners to help each other.
 |
 |
 |
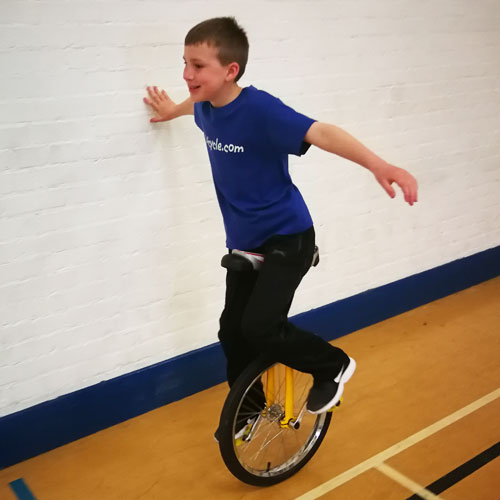
5. Launching - moving off in to space - 30 to 60 minutes.
When they have succeeded in moving smoothly along the wall you need to get them to launch away from the wall. There are 2 basic techniques here; you can get them to veer off from the moving position or launch out at 90 degrees from the wall. The second option is preferred but it depends on the riders confidence. Before you leave your learner to practice the launching away from a wall by themselves be sure they are confident at dismounting in to free space. Repeat multiple times and see they are confident at walking off the front of the unicycle and not trying to catch the saddle. Key points:
- Make sure the space they are launching in to is clear.
- Make sure they are confident at dismounting.
- Do not ride too slowly, speed is good.
- Look ahead at a fixed object, not your feet.
- Put all the weight through the saddle - do not stand up on the pedals.
If you have an experienced rider with the learner you can get them to hold the riders hand lightly and ride along next to them. This helps them over the initial change in balance of the launch away from a wall. It also gives them confidence.
 |
Other notes to assist in the teaching
Demonstrating at each stage help to convey the key points. These stages are not linear, but can be combined as in stage 1 and 2. It is not bad to go back to the beginning again and again. This helps with the riders confidence.
Supporting and "spotting" riders to assist them and keep them safe can be done in several ways:
- Hold the elbow and hand of the riders free arm (do not stand in front)
- Hold the elbow and a clenched hand facing down so they can hold on to your wrist
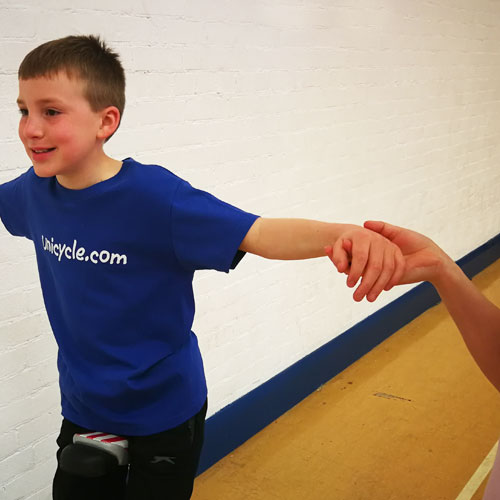
- Hold on hand out stretched.
- Offer a hand with a clenched hand facing down so they can hold on to your wrist.
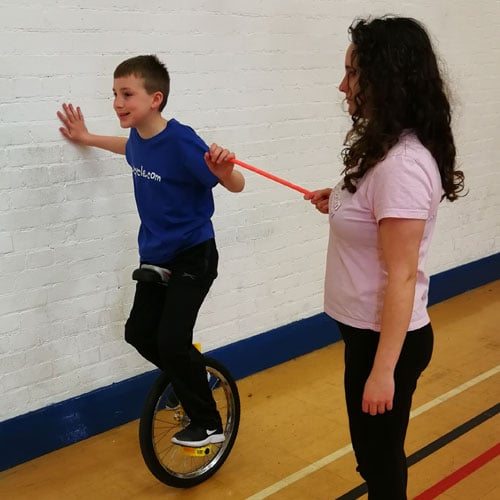
- Hold a short stick out for them to hold on to.
- Ride along side the learner holding hand, palm down and then stick.
When working with large groups I tend to split the group into pairs. This allows them to help each other, particularly in the moving stage where a steadying hand is helpful.
 |
 |
Where to learn and Safety
Finding the ideal teaching space is very hard to do. Firstly it should get a smooth flat surface clear of any obstacles or debris. You should have at least one long clear wall, without any doors or alcoves in it. Ideally the bar should be at chest height. The ideal space is often not available in fact I don't think I have ever seen one. So you are then picking the best space that is available. Here are some of the things to look out for:
- Doors - I have seen people hit by doors or fall through them when they put weight on them. In the worst case I have seen someone was using the door itself for support and fell backwards closing the door and then trapped their fingers as they went.
- Grass - It is not that this is unsafe, just a lot harder to teach on if the wheel is not on a smooth surface.
- Carpet - Unless it is very thin it tends to track the wheel and makes it hard to ride on.
- Astroturf / Composite Rubber - These can be found on tennis courts, there seams to be no set answer here; sometimes they are great places to learn other times they are nightmare with catching the tyre and tracking like carpets.
- Flagstones - Check for them being smooth and without large gaps between them.
- Tarmac - This can be good to ride on but when people fall they will get scrapes on their knees and hands.
- Glass - A lot of modern spaces now have large glass window panels. Avoid!
Reducing any risks
Here is a check list before you actually get to started to try and reduce the chance of any accidents:
- Environment Check - Be sure that there are no tripping obstacles on the floor or walls.
- Unicycle Check - Are all the unicycles in working order? Quick releases fitted and tightened properly and pointing down, pedals tight and tyres pumped up. You then need to be sure that it is fitted to the person correctly. From sitting on the seat the leg should be absolutely straight when the pedal is at the bottom of the stroke.
- Safety Talk - I warn people that this is a physical activity and that they should expect fall at some point. They should be aware of riders around them and not ride too close to them. They should listen to advice given as it is often guided towards keeping them safe. I often tailor the talk to warn people of the dangers of the environment they are in eg. Avoid doors, pillars, holes etc. I also ask people if they are prone to falling or breaking bones; if they are then I recommend wearing safety equipment.
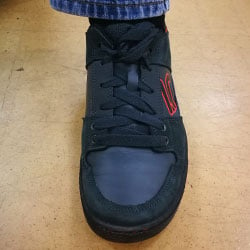
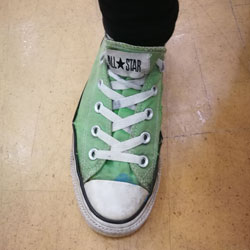
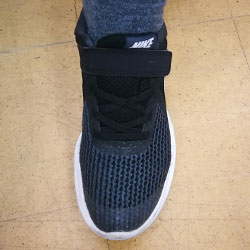
- Clothing Check - No baggy trousers, no scarves, or dangling bits. I also make everyone tuck shoe laces in to their shoes. I always show my shoes, since I always tuck my laces in it is a good example.
- Safety Gear - When you are doing basic level teaching of unicycling I feel that most safety gear is superfluous although is required if you have high risk individuals or a hard environment. I will add there that a learner should be taught to fall properly, without this then yes they do need protective gear. There are exceptions where I would recommend wearing safety gear; this is where the environment or the person requires them. For example if you are on tarmac; then knee, elbow and wrist guards are useful against grazes. In my opinion learning to ride a unicycle is safer than playing most sports played in schools.
 |
 |
 |
Do's and Don'ts
- Always check that the area is safe before teaching unicycling, be sure it is clear of obstacles and dangerous surfaces.
- Don't use walking poles (these are dangerous to the rider and other around them, they also encourage stooping).
- Don't try and teach too many people at any one time
- Don't support the saddle at any stage other than in an emergency to stop a rider from falling off backwards.
- Do not stand in front of someone learning.
- Emphasis that NO ONE can unicycle without practice, everyone has to learn.
- Relax and enjoy it.